Showing posts with label Kids Cooking. Show all posts

Wednesday, November 10, 2010

Chocolate Covered Pretzel Monsters

From: http://www.cuteasafox.com/
I saw these ghost pretzels featured on Craft Gossip, Edible Crafts and knew I had a winner.


(Originally posted on PBS Parents)

I decided I wanted to branch out a bit and try some other monsters too. So today I am going to show you my Pretzel Mummies and Frankensteins.

What you need:

• Rod Pretzels
• Candy Melts or Candy Coasting - I used White Chocolate, Regular Brown, and 'Spooky Green' candy melts
• An edible ink pen or toothpick to draw on faces

Step 1. Dip all your pretzels once. White for mummies and green for Frankenstein.

Step 2. After the chocolate has set draw on your Mummy eyes.


Step 3. Using a spoon or cutting a corner in a ziploc bag, drizzle the chocolate back and forth over the pretzel. This will make th bandages. I like to get reallly close to the eyes. I even went in between some of the eyes or partially covered them.

Step 4. Let them set lying down just to make sure your bandages don't run and drip. You don't want to get those eyes covered up!

Step 5. Optional: Once the front has set, you can add more 'bandages' to the back. I didn't, but you may want to.

Frankenstein:

Step 1: Dip your pretzel rods in green candy melts and let it set.

Step 2. Dip just the tip in brown or black for Frankenstein's hair. Let set.


Step 3. Using your Food dye pen, draw on some eyes, a stitched up mouth, and neck bolts.

My pen started giving me fits half way through so I decided to switch to using the melted chocolate for the faces. It was late and I was tired, so I just went at the rest of my Franketsteins with a toothpick and the chocolate. I think putting some chocolate in a ziploc and cutting a teeny tiny hole in the corner would work much better.

Here are my finished pretzel monsters again. They were a huge hit at preschool! That is a good thing, because making 48 of them sure did take a long time! Each child got 2 pretzels and some apple slices. Sounds like a snack I wouldn't mind having myself!

Spooky and delicious!

Chocolate-Dipped Twinkie Mummies

These are dangerous.

And completely irresistible.
And definitely not carrot sticks.
Consider yourself warned.

Start with a box of Twinkies (which normally contains 10, but somehow, we only had 6 in our box--now how did that happen? LOL).

Insert craft sticks and freeze them for about an hour. This helps with the dipping later.

Melt a package of chocolate chips and dip the Twinkies in, spreading the chocolate evenly.

Place them back in the freezer while you melt a package of white baking pieces.

Pour your melted white chocolate into a baggie and pipe strips on your Twinkies using a flat tip.

Add eyes with icing or candy.

You can eat your mummies cold, but they are So YuMmY at room temp.

Happy Halloween!


Chocolate Dipped Candy Corn Rice Krispie Treat

From: http://www.alittletipsy.com/

Ingredients:

• 3 tablespoons butter or margarine
• 1 package (10 oz., about 40) regular marshmallows
• 6 cups Rice Krispies
• Yellow and red food coloring
• 1/2 cup Chocolate chips
• 1/2 cup White Chocolate Chips
• 1 teaspoon Crisco

1. In microwave-safe bowl heat butter and marshmallows on high stirring once a minute, until smooth. Add food coloring to die the marshmallow mixture orange (about 4 yellow drops and one red drop).

2. Add Rice Krispies cereal. Stir until well coated.

3. Using buttered spatula evenly press mixture into two 9 inch round pans coated with cooking spray. Cool.
 4. Cut into 8 triangles. Round the pointed edges to make them look more like candy corns.

5. Melt chocolate chips with 1/2 teaspoon of crisco in microwave on 50 percent power stirring often. Spoon melted chocolate over the big end of the triangle. Place on wax paper.

6. Repeat step 5 with the white chocolate on the small end.

7. Place in fridge to help chocolate set.

Hope you like this rice krispie treat as much as we did!

Tuesday, November 9, 2010

Magic Wands

Ingredients


• 1 (15 ounce) package pretzel rods
• 1 (16 ounce) container prepared vanilla frosting (or melted white chocolate)
• 1/2 cup sprinkles or colored sugar for decoration

**Dip each pretzel rod into frosting, not quite half way. Roll in sprinkles to coat the frosting. Abracadabra, you have a magic wand!

For Halloween....make ghosts

Friday, October 1, 2010

PBJ n' Banana Burritos

• 2 tablespoons smooth natural peanut butter
• 1 whole wheat tortilla
• 1 banana
• 1 tablespoon apricot jelly (or jelly of your choice)
• 1 teaspoon honey

Directions

1. Spread the peanut butter evenly over the middle of the tortilla; spread the jelly in a layer over the peanut butter. Lie the banana atop the peanut butter and jelly layers. Drizzle the honey over the banana. Fold the two ends of the tortilla over the tips of the banana and roll the other two ends of the tortilla over the mixture to form a burrito.

Friday, August 27, 2010

Best Ever Popcorn Balls

• 3/4 cup light corn syrup
• 1/4 cup margarine
• 2 teaspoons cold water
• 2 5/8 cups confectioners' sugar
• 1 cup marshmallows
• 5 quarts plain popped popcorn

• In a saucepan over medium heat, combine the corn syrup, margarine, cold water, confectioners' sugar and marshmallows. Heat and stir until the mixture comes to a boil. Carefully combine the hot mixture with the popcorn, coating each kernel.

• Grease hands with vegetable shortening and quickly shape the coated popcorn into balls before it cools. Wrap with cellophane or plastic wrap and store at room temperature.


Love this soft chewy recipe!!!! EASY!!! A quick way to make balls is to oil a cup(measuring cup works well) ans stuff coated popcorn in. A tap to the bottom of the cup onto waxed paper leaves beautiful balls! Yum!! I've made them a few times and love them but add 2 teaspoons of vanilla to flavor Remember to butter hands before playing in coated popcorn or it'll stick!.

Using the insert for crock pot sprayed w/cooking spray and 1 1/2 bags of popcorn, used 1/2 of hot syrup mixing w/sprayed spatula and 1 measuring cup for shaping balls as well as spatula. I just sprayed one hand and rubbed hands to help further shape if needed. The syrup mixture was then reheated and process was repeated. It came out perfect, little bigger than baseball about 22 servings. Used zip sandwich bags to hold and give out.

Thursday, August 5, 2010

Alphabet Cheesy Crackers:


From: www.splendidmissm@blogspot.com


Ingredients:

1 1/2 cups all purpose flour (188 grams)
2 cups extra sharp cheddar, grated (about six ounces)
1/4 cup grated parmigiano reggiano
a stick of butter at room temperature
1/8 teaspoon of chili pepper. It doesn’t make them spicy at all, it just adds depth of flavor.


Place all of your ingredients into a large bowl, along with a few grinds of black pepper. It’s best to grate the cheese yourself because the pre-grated stuff they sell at the grocery store is coated in cornstarch and that will throw off the consistency of your final product. I also like to grate my own Parmesan because it’s better quality and tastes better than the pre-grated kind. Just for goodness sakes, don’t ever use the powdered stuff in the green can.

Don't skip the chili powder!!  It gives it a great flavor
I used a pastry blender to start to bring everything together. Once it started to clean the sides of the bowl, I switched to my hand and made sure it was mixed well.

Separate into two halves, wrap in plastic wrap, and place in the fridge for 30 minutes. If you want to be like me, you can forget about it completely (whoops!) and leave it overnight too, it’s okay. Just let them sit on the counter for about half an hour before you attempt to roll them.

These are my alphabet cookie cutters.  Each letter is about an inch tall.  Try some using holiday shapes too! 
Roll out your cracker dough to somewhere between 1/4 and 1/8 inch thick. These cutters are really tiny, so there is a bit of a learning curve to them. If you dip them in flour before each cut, it helps. Also, if a cracker gets stuck inside the cutter, just hold it about 1/4 inch above your cookie sheet and gently poke it loose with a toothpick. You can use a thin, flexible metal spatula to lift the ones that stay put from your rolling surface.

Place your crackers either on a parchment lined baking sheet or one lined with a Silpat. Be sure to leave a little bit of room between them because they will puff slightly while baking. Bake at 325 degrees for eleven minutes and then allow to cool completely on the pan before removing.


Confession time – Sometimes I only do one pan worth of alphabet crackers.  For the remaining dough, I simply take a pizza cutter (or in this case, a fondant cutter/embosser) and cut the dough into plain squares before baking. They taste just as good and take a fraction of the time that the letters do. I store them in these Burken jars from Ikea and it keeps them fresh for quite a while!

Thursday, July 22, 2010

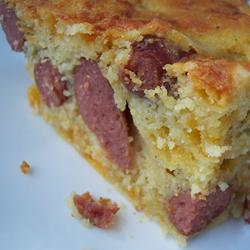
Corn Dog Casserole

• 2 cups thinly sliced celery
• 1 1/2 cups sliced green onions
• 2 tablespoons butter
• 1 1/2 pounds hot dogs (beef and pork frankfurters)
• 2 eggs
• 1 1/2 cups milk
• 2 teaspoons ground sage
• 1/4 teaspoon ground black pepper
• 2 (8.5 ounce) packages dry corn bread mix
• 2 cups shredded Cheddar cheese, divided

1. In a medium skillet, saute celery and green onions in butter for 5 minutes. Place saute mixture in a large bowl; set aside.

2. Slice hot dogs lengthwise into quarters, then cut into thirds. In same skillet, saute hot dogs for 5 minutes or until lightly browned. Add to celery/onion mixture and mix all together. Set aside 1 cup of mixture.

3. Preheat oven to 400 degrees F (200 degrees C).

4. In a large bowl combine the eggs, milk, sage and pepper. Add all but reserved 1 cup hot dog mixture. Stir in corn bread mix and 1 1/2 cups shredded cheese. Mix all together and spread mixture into a shallow 3 quart baking dish. Top with reserved 1 cup hot dog mixture and remaining 1/2 cup shredded cheese.

5. Bake uncovered in preheated oven for 30 minutes, or until golden brown.

Notes: Omitted the sage and celery add a can of creamed corn.
 I did not add the sage, I used 1/2 shredded cheese and 1/2 velveeta, and cut the hot dogs into 1/4 inch rings which made the hot dogs go farther. I also halved the recipe and it made a 9x9 inch pan.

This was wonderful! The only changes that I made was to use only 2/3 cup milk and add a can of creamed corn. I think next time I am going to make these into muffins so I can keep them for quick snacks for my kids.

Even if the celery sounds unusual, leave it in for the moisture.

Tuesday, June 8, 2010

Ice Pops

• 1 (3 ounce) package fruit flavored gelatin mix
• 1 unsweetened, flavored soft drink mix package
• 1 cup white sugar
• 2 cups boiling water
• 2 cups cold water

Directions

1. Dissolve gelatin, soft drink mix and sugar in boiling water. Stir in cold water and pour into popsicle molds or small plastic drinking cups. Freeze until hard. (If using plastic drinking cups, freeze until firm, insert popsicle sticks, then freeze completely.)

One thing I like to do is make several different flavors all at once, so I mix all the powders and sugars together then divide mixture between four ziplock bags.I do this with four different flavors then I keep it premixed in the cupboard ready to add boiling water. That way I can have four different flavors at the same time, and have more ready to go for later.

If using little cups after pouring in the liquid, wrap the tops with foil and poke the sticks in. That way you don't have to wait until they partially freeze. Stick them in and forget about them and the sticks will already be in them.

I made these last night, but I used Watermelon Cherry Kool-Aid along with a Watermelon JELL-O gelatin. With all the new varieties that Kool-Aid and JELL-O gelatin has come out with lately, making home-made popsicles now-a-days is so much fun


Edible Playdoh

ITEMS YOU NEED:


• 3 c. powdered sugar
• 1 stick butter, softened
• 3/4 c. peanut butter

DIRECTIONS:

• Combine all three ingredients in a large bowl, using your hands to make sure it's well mixed.

• Let them play! Raisins, nuts, pretzels, dry cereal, and chocolate chips make fun additions to their creations.


Thursday, April 29, 2010

Homemade Pop Tarts

Most recipes I have come across use a pie dough for the pastry but I was really stuck on getting a crust that was a little more sturdy — one with an egg. Often I see fillings of just jam, yet a little thickener added to the jam goes a long way towards keeping it from being too wet and soggy inside. Finally, a lot of versions I came across while I was digging around offer some sort of apology that the glaze (should you make one) isn’t as hard as the packaged ones, that a homemade version really wont hold up well in an upright toaster or that the brown sugar filling doesn’t have the odd stiffness of the ones you can buy at the grocery; this version does not. Sure, it may lack the sturdiness and shell-like slick of a packaged Pop Tart, but it has the buttery, flaky, no-toaster-required-to-soften-it transcendence the grocery store aisle version can only dream about, and hooray for that.

Homemade Pop Tarts
from King Arthur Flour

Pastry

2 cups (8 1/2 ounces) all-purpose flour
1 tablespoon sugar
1 teaspoon salt
1 cup (2 sticks or 8 ounces) unsalted butter, cut into pats
1 large egg
2 tablespoons (1 ounce) milk
1 additional large egg (to brush on pastry)

Cinnamon Filling (enough for 9 tarts)

1/2 cup (3 3/4 ounces) brown sugar
1 to 1 1/2 teaspoons ground cinnamon, to taste
4 teaspoons all-purpose flour
1 large egg, to brush on pastry before filling

Jam Filling

3/4 cup (8 ounces) jam
1 tablespoon cornstarch mixed with 1 tablespoon cold water

Alternate Fillings: 9 tablespoons chocolate chips, 9 tablespoons Nutella or other chocolate-hazelnut paste or 9 tablespoons of a delight of your choice, such as salted caramel or a nut paste

To Make Cinnamon Filling: Whisk together the sugar, cinnamon, and flour.

To Make Jam Filling: Mix the jam with the cornstarch/water in a small saucepan. Bring the mixture to a boil, and simmer, stirring, for 2 minutes. Remove from the heat, and set aside to cool. Use to fill the pastry tarts.

Make The Dough: Whisk together the flour, sugar, and salt. Work in the butter with your fingers, pastry blender or food processor until pea-sized lumps of butter are still visible, and the mixture holds together when you squeeze it. If you’ve used a food processor, transfer the mixture to a large bowl. Whisk the first egg and milk together and stir them into the dough, mixing just until everything is cohesive, kneading briefly on a well-floured counter if necessary.

Divide the dough in half (approximately 8 1/4 ounces each), shape each half into a smooth rectangle, about 3×5 inches. You can roll this out immediately (see Warm Kitchen note below) or wrap each half in plastic and refrigerate for up to 2 days.

Assemble The Tarts: If the dough has been chilled, remove it from the refrigerator and allow it to soften and become workable, about 15 to 30 minutes. Place one piece on a lightly floured work surface, and roll it into a rectangle about 1/8″ thick, large enough that you can trim it to an even 9″ x 12″. [You can use a 9" x 13" pan, laid on top, as guidance.] Repeat with the second piece of dough. Set trimmings aside. Cut each piece of dough into thirds – you’ll form nine 3″ x 4″ rectangles.

Beat the additional egg and brush it over the entire surface of the first dough. Place a heaping tablespoon of filling into the center of each rectangle, keeping a bare 1/2-inch perimeter around it. Place a second rectangle of dough atop the first, using your fingertips to press firmly around the pocket of filling, sealing the dough well on all sides. Press the tines of a fork all around the edge of the rectangle. Repeat with remaining tarts.

Gently place the tarts on a lightly greased or parchment-lined baking sheet. Prick the top of each tart multiple times with a fork; you want to make sure steam can escape, or the tarts will become billowy pillows rather than flat toaster pastries. Refrigerate the tarts (they don’t need to be covered) for 30 minutes, while you preheat your oven to 350°F.

Tip From King Arthur: Sprinkle the dough trimmings with cinnamon-sugar; these have nothing to do with your toaster pastries, but it’s a shame to discard them, and they make a wonderful snack. While the tarts are chilling, bake these trimmings for 13 to 15 minutes, till they’re golden brown.

Bake The Tarts: Remove the tarts form the fridge, and bake them for 20 to 25 minutes, until they’re a light golden brown. Cool in pan on rack.

Whole Wheat Variation: I was itching to swap out 1/2 cup of the flour with whole wheat flour. I am sure it would make it more deliciously breakfast.

Pop Tart Minis: The biggest struggle I had with these was the size. I actually like my baked goods on the tiny size, thus I think this could make an adorable batch of 16 2 1/4″ x 3″ rectangles.

Savory Pop Tarts: Nix the sugar in the dough and halve the salt. Fill with pesto, cheese, ground nuts or olives, or any combination thereof. Brush the tops with additional egg wash and sprinkle with poppy or sesame seeds. Please invite me over.

Do ahead: The sweet versions should keep at room temperature in an airtight container for a week. If you’d like to make them further in advance, I vote for freezing them unbaked between layers of waxed paper, and baking them as you need.



Wednesday, February 24, 2010

Hearty Pizza!

Cookie Cutters are not just for Cookies


From: Feelslikehome.blog.com
Pizzas are a perfect cooking activity for young kids, they don’t require to be near a hot stove and they are practically a shoe in even for picky eaters. Blend carrots and peppers into the sauce, and they get their veggies! Also using tortillas makes it easy to shape the crust into a heart.
1. Gather your materials. You will need a pan, oven , tortillas, pizza sauce, pepperoni , mozzarella , kitchen sheers and a heart shaped cookie cutter.

2. Start by folding your tortilla in half and cutting it into a heart.

3. Next using the cookie cutter make your heart shaped pepperoni, you could do this with a host of other toppings as well.

4. Time to gather the kiddos!

5. Spread the sauce on

6. Add the cheese, I am not sure if he is putting it on or taking it off in this picture. Shred much more than you need if your little chef is a fan of cheese!

7. Add the pepperoni! My son insisted the hearts were eyes, so we made a mouth too.

8. Bake- I baked ours at 400* for about 10 minutes, checking on it often.